Signing up is easy, you can sign up directly through our website by clicking "Sign Up", located at the top right of your screen and follow the instructions to create an account.
Note: For verification purposes you must create the account under your legal name and address listed on your IDs. If you are using this for business purposes, you can add your business name to your account at signup. Upon signup, you will be required to submit a notarized USPS Form 1583, along with 2 acceptable IDs. Once that has been received and approved by your mail center, you’ll have full access to your account and the mail that arrives to your new virtual mailing address.
Step 1. Choose a Location and Plan.
Choose a physical address from 3,500+ digital mailbox locations across the U.S. and abroad, this address will be where you will receive your mail. Then select the plan that is best for you, depending on how much mail you expect to receive.
Step 2. Checkout.
Provide your contact information and select a payment method via a credit card or PayPal account.
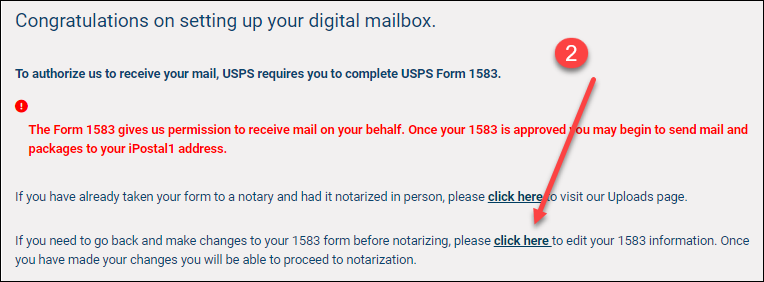
Step 3. Upload Form 1583.
After signing up, you will be assigned a personal mailbox number and a USPS Form 1583 that authorizes your digital mailbox location to receive mail on your behalf. You will need two forms of acceptable IDs and you can then choose to notarize online or in person at your mail center location.
If you will visiting your mail center to notarize in person, please call ahead to be sure that they offer on site notary. iPostal1 makes this process easy.
Step 4. Redirect Your Mail after your account is fully approved.
To begin receiving mail at your new address, file a Temporary Change of Address form with the USPS and/or notify senders directly, once your account is approved.
With your new virtual mailing address, you will be able to:
- View and manage your mail from anywhere 24/7. See your mail as soon as it is received. Use our free app or any computer to view an image of the outside of each mail item you receive. With a click or tap, tell your mail center what you want to do with each item: forward, scan, schedule a pickup, discard, or shred.

- Receive Mail & Packages from Any Carrier. Because every iPostal digital mailbox address is a real street address, not a standard postal box, you can receive mail and packages not only from the USPS, but also from FedEx, UPS and other carriers.

- Add Locations with Just a Click. It's fast and easy to add additional address locations for business or personal use. Manage mail for all locations from one login.


 Step 3. To finish, scroll down and click the "Schedule" button to complete your request.


 Step 6. Verify that your information is accurate and tab "Send Request" to complete your order.


 Step 2. Tap on the "Menu"
  button in the top left corner.


